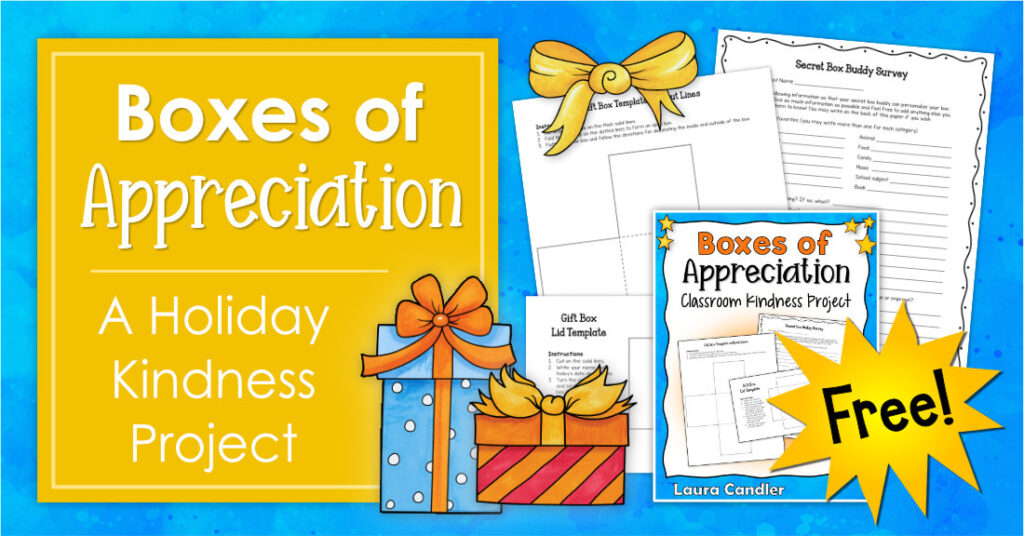
Some of the most important lessons we can teach our students have nothing to do with academics and everything to do with kindness. That’s why I’m excited to share a brand new resource with you called Boxes of Appreciation. My daughter Amy and I have spent the last week working together to create this fun holiday kindness project, and we know your kids will love it! They will also learn valuable lessons about how to give genuine compliments to each other and how to show appreciation in other ways.
Boxes of Appreciation is perfect for the week before winter break, although it can be used other times of the year, too. If you don’t have time to do this activity in December, it would also work well as a Valentine’s Day kindness project or even an Easter activity.
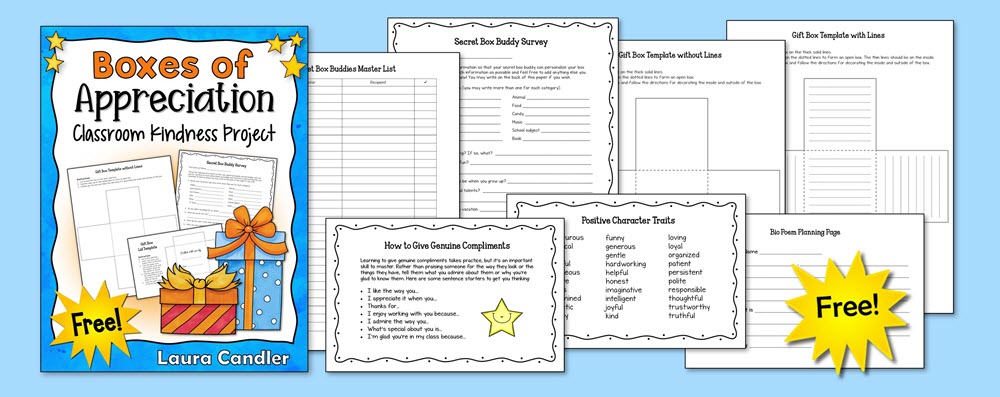
The activity begins with each student secretly filling out a survey in which they answer questions about their favorite things and what they like to do. The teacher collects the surveys and assigns each student a secret box buddy. Next, students use the information on the survey to create and customize a small box for their buddy. The outside of each box is decorated with pictures of what their box buddy likes, and five genuine compliments are written inside the box. Each student also uses the template provided to write a short Bio Poem to place inside the box. Watch this short video to see an example of a completed Box of Appreciation.
Boxes of Appreciation Lesson Overview
Boxes of Appreciation is available for free from my TpT store. This resource includes several pages of detailed directions as well as all the printable templates and resources you need to complete the project. This is a multi-day activity designed for 4th and 5th grade, but it may work with younger students if you can provide assistance with some of the tasks. The lesson overview below may help you decide if this project is right for your students.
Suggested Timeline: If you follow the suggested lesson plan below, the activity will take about 30 to 45 minutes per day, and about 4 days to complete, with the boxes being shared on Day 5. However, your students might need more or less time for each part of the project. If possible, plan to collect the boxes at least a day before your students exchange them. You’ll want to be sure that a box is prepared for every single student.
If you don’t want to spread this project out over 4 or 5 days, you can adjust the timeline to fit your schedule. For example, you could have the students fill out the survey on the first day, create the boxes in one long session on the 2nd day, and share them on the 3rd day.
Materials Needed
Most of the materials needed for this project are items that you already have at school, such as crayons, colored pencils, printer paper, scissors, and clear tape. However, there are a few things you may need to purchase. Because the lesson will take several days, you’ll need your students to place their materials into a 9 x 12 manilla envelope for you to collect and store in a safe place. You’ll need to print the box and lid on white cardstock, and you’ll also need a 1-inch self-adhesive gift bow for each box.
Day 1 – Getting Started
The activity begins with each student filling out the Secret Box Buddy survey. How much time this takes will depend on your grade level and your students’ ability to read and answer questions independently. It’s not necessary that they answer every single question, but the more information they provide, the easier it will be for their buddy to create his or her gift box. At the end of the allotted time, collect the surveys to review later.
Before the next part of the lesson, you’ll need to assign box buddies and record them on the Secret Box Buddies Master Checklist provided. List the names of all of your students in the Gift Creator column, and use the Recipient column to record the name of each person’s box buddy. Then write the name of each student on the outside of a 9 x 12 manilla envelope, and tuck his or her box buddy’s survey inside.
Day 2 – Creating and Decorating Gift Boxes
Give each student the envelope labeled with his or her name, and ask them to secretly pull out the survey and read it. Remind them that the name of their box buddy needs to remain secret, so they shouldn’t look at the person or do anything to give away the secret. Guide them through the process of cutting out the box and lid, using the templates provided in the freebie. Ask them to write their box buddy’s name on the blank side of the lid, leaving space in the corner for a small bow to be added later. They write their own name and the date on the other side of the lid on the lines provided. Ask them to draw pictures of the things their box buddy on each outside panel of the box. At the end of the lesson, ask your students to place all of their materials into the manilla envelope. Collect the envelopes and store them in a safe place.
Day 3 – Writing Compliments and Bio Poems
Most children don’t know how to give a genuine compliment, so you’ll need to start the lesson by discussing what it means to compliment someone. You’ll find a visual called “How to Give a Genuine Compliment” in the freebie which you can display for the class to discuss. Explain that a genuine compliment is more than praising someone’s clothing or the cool things they have. Guide your students through the process of writing five genuine compliments on the inside panels of the box.
If time allows, introduce Bio Poems and have your students begin planning their poems. Display the Sample Bio Poem provide in the freebie, and explain the general format. A Bio Poem starts with the person’s name on the first line which is followed by 3 positive character traits that describe the person. The rest of the poem is a series of statements about what the person enjoys doing or dreams of doing in the future. Give each student a copy of the Bio Poem Planning Page and ask them to use the information on the Secret Box Buddy Survey to fill out the form. Collect the bio poem planning pages and review them before the next part of the lesson.
Day 4 – Finish Bio Poems and Assemble Boxes
Give each student one copy of the bio poem lined writing paper provided in the freebie. Have them neatly copy the words from their planning form over to that paper, and remind them to write their name at the end of the poem. Demonstrate how to fold their bio poems so the paper will be small enough to fit inside the box.
Now it’s time to assemble the boxes and lids. First, demonstrate how to fold the edges of the lid down on the dotted lines with the box buddy’s name facing up. They should tape the short edges together and attach the gift bow to the top. Next, ask them to fold the sides of the box up on the dotted lines so that the compliments are inside. Remind them NOT to tape the sides of the box together. Instead, they should place the lid on top, tucking the sides into the lid so the box stays together.
Collect the boxes as students finish them, and check off each name on your master list. Make sure that a box has been prepared for every student. If you discover that one is missing, you may need to make the box yourself to be sure that every student receives one.
Day 5 – Sharing Gift Boxes
Designate a day and time for giving out the gift boxes. You can hand them out yourself, or give each box to the person who created it and let them deliver the box to their box buddy’s desk. Some of the boxes may be decorated more elaborately than others, so remind your students to appreciate the thought and effort that went into them and not to judge them by the creator’s artwork or handwriting. Discourage your students from showing the compliments that were written inside the box to other classmates, but allow time to share their bio poems if they wish. Wrap up the activity by discussing how it feels to receive gifts of appreciation like the ones in the box, and how acts of kindness are often more meaningful than physical gifts.
Tips for Success
- Play instrumental holiday music each day while students are working to set the mood. Amy and I like this YouTube compilation of traditional Christmas music because it’s so calming and relaxing.
- Print an extra copy of the materials for yourself, and make a sample box to use when you introduce the lesson. Be sure to fill out the survey in advance, too. As you work through this activity on your own, you’ll spot potential problems for your students which will allow you to better guide them.
- Consider printing extra copies of the lid and box templates on plain paper so that your students can create a practice box before the final one. Some aspects of the box creation process can be a bit confusing. For example, when you decorate the sides of the box, it’s easy to accidentally draw the pictures the wrong direction making them upside down when the box is assembled.
- Adjust the timeline so that you can collect the completed boxes at least a day before the gift exchange day. You’ll want to be sure that a box is prepared for every single student, and if one is missing due to a student absence, you may need to make an extra box or two. If you were planning to have your students exchange gift boxes the day before winter break, make sure that all boxes are finished the day before.
- Ask your students to write the five genuine compliments on plain paper for you to review before they transfer them to their boxes. This step will prevent students from writing inappropriate or unkind statements inside that boxes that are only discovered on the gift exchange day.