Guest post by Michael Friermood at The Thinker Builder.
I almost returned it before even getting started. They don’t tell you on the box, and certainly not on the display, that there are 37 steps to assemble the shoe cabinet that you are about to buy.
Seriously. Thirty-seven. I was still trying to wrap my mind around the $129 we just spent, and then I see the “this-is-going-to-take-all-afternoon” manual. It was a deflating start. Wouldn’t it be better with, oh I don’t know, maybe… 3 steps?
Okay, only three steps might sound a bit extreme, but the more I thought about it, the more I liked the idea. By grouping all of these tiny, detailed steps into three main steps, I would:
- See a “big picture” view of the entire assembly process.
- Not want to hurt myself with the enclosed Allen wrench.
I even started thinking it through for the shoe cabinet—Step One: Put the frame together. Step Two: Put the drawers together. Step Three: Install the cabinet. All thirty-seven little steps are still in there, now just neatly organized.
And so began the idea for a lesson on how to teach procedural writing by grouping smaller steps into three main steps. What’s interesting is how many other literacy strategies are embedded. Be on the lookout for skills like determining importance, summarizing, finding main ideas and details, and of course, sequencing.
In “practice-what-you-preach” style, here are the three main steps to teach the lesson on three-step procedural writing:
Step One: Teacher models the process.
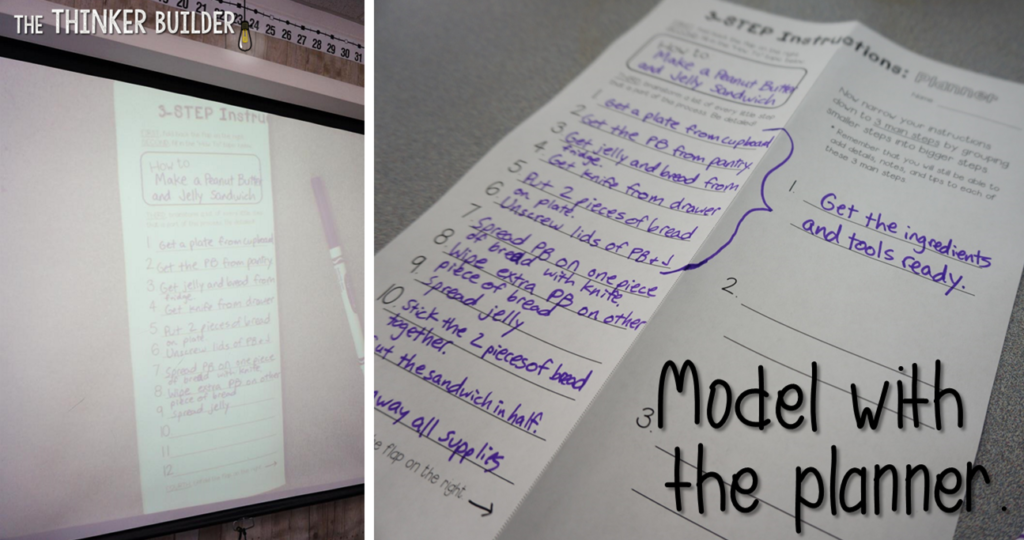
I first modeled the process of narrowing a list of steps. I used the topic, “How to Make a Peanut Butter and Jelly Sandwich.” Together, we brainstormed a laundry-list of all the steps needed to make the sandwich, even little ones like “unscrew the lid.” I was looking for about a dozen or so steps. I wrote them down sequentially on the left side of my paper.
On the right side, I showed students how to narrow down our list to just three steps. I began grouping similar steps together, making sure each task fit into one of the three groups. I then looked at each group, and decided on its main idea, which became the title of the step. It was important to explain that I didn’t need to give all the information in the main step’s title—I would still have space to add details to each main step when I wrote my final instructions in the mini-book.
Step Two: Students plan their instructions.
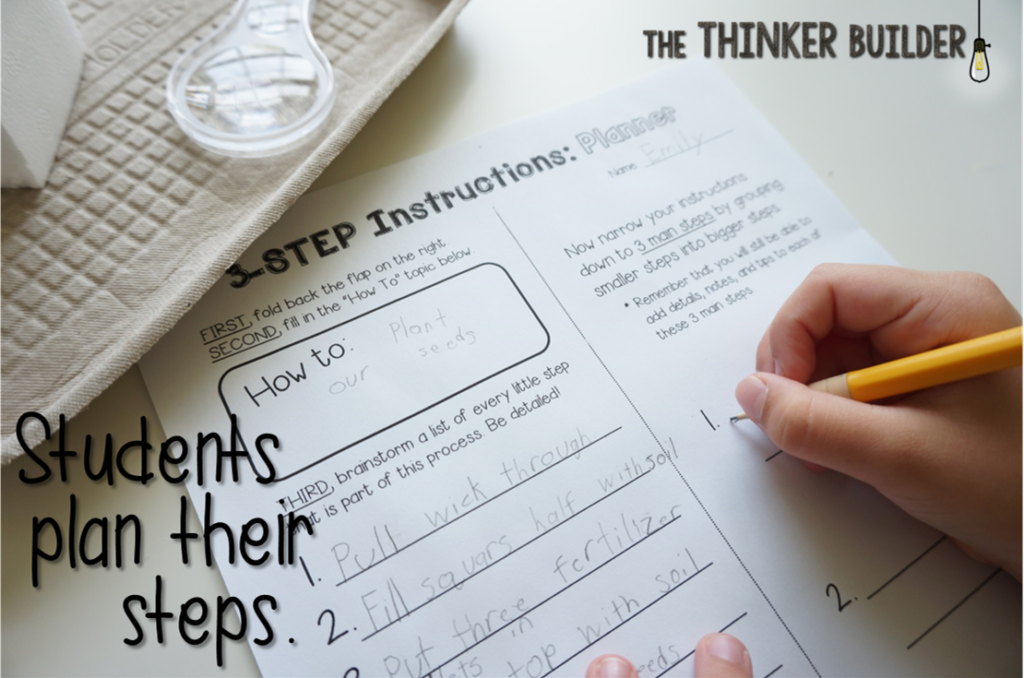
Students then planned their own set of instructions. For my class, I was tying our writing into our science unit on plant growth, so my students had the topic, “How to Plant Our Seeds.” We had just completed the seed-planting process earlier in the week, so I felt like we would have a common understanding, and it was a good opportunity to use some of our new vocabulary.
As students were planning, I allowed them to brainstorm with their table groups their long list of steps for the left side of their planner. Then they worked with their science partner to narrow their list to the three main steps.
Step Three: Students create the foldable mini-book.
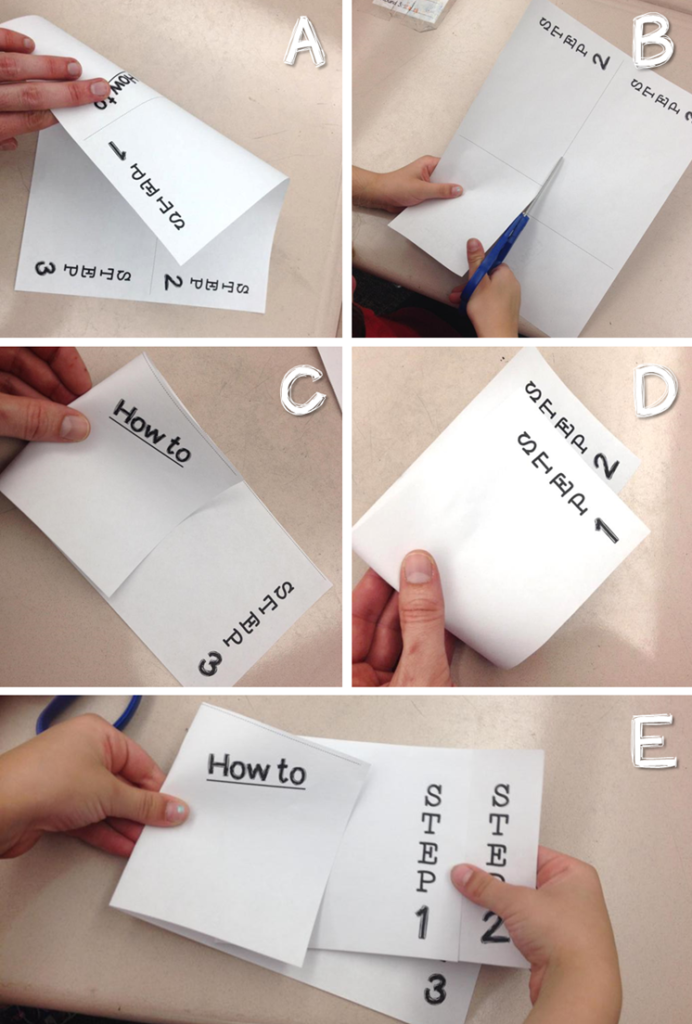
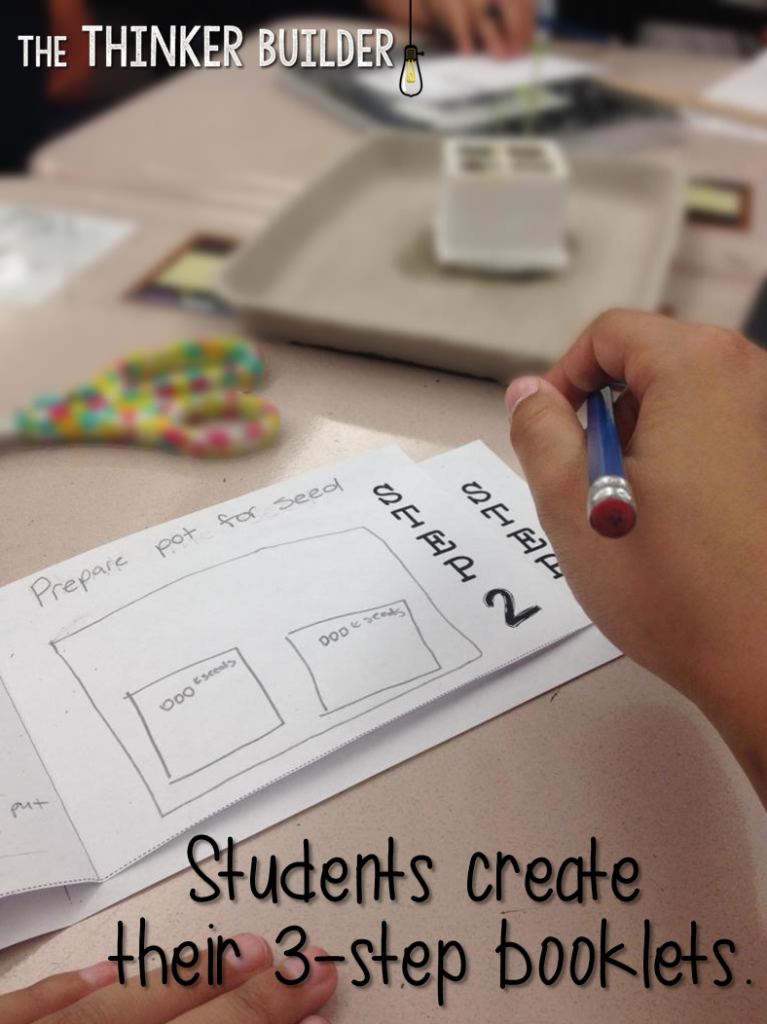
The final phase was to take our procedural plans and use them to complete a cool little foldable mini-book, which just so happens to have spaces for three steps. As a whole class, I showed how to cut and assemble the mini-book, and as students were writing, I came around and stapled them—the books, not the children. (You could also attach the pages with a thin line of glue along the fold between the pages.)
In the mini-book, there are pages for all three main steps. On each of these pages, I required students to write their main step as the heading, add details and tips that fit the step, and draw a diagram of the most important part of the step.
You can pick up the materials for this lesson for free right HERE. And while you’re doing that, I’m going to take my shoes off and relax… after I put them away, of course.
Michael Friermood is a third grade teacher who encourages deep, bold thinking from his students. He has taught at the elementary level for ten years. You can find more fresh ideas for your classroom at his blog, The Thinker Builder.


